Difference between revisions of "Jwoodlee Week 12"
(→Java Project Setup: removed unnecessary text) |
(→Initial Build: added procedure) |
||
| Line 21: | Line 21: | ||
* I clicked Yes when Eclipse asked if I wanted to open the Java perspective. | * I clicked Yes when Eclipse asked if I wanted to open the Java perspective. | ||
| − | ==== Initial Build ==== | + | ==== Initial Build of GenMAPP Builder in Eclipse==== |
| − | + | I opened the gmbuilder project by clicking on the little gray triangle left of its name. I right clicked on build.xml and chose Run As > Ant Build... (including ellipses). | |
| − | + | I then unchecked dist and rechecked clean and dist in the Targets tab in that order. When the order of the Target execution order box saidclean, dist I clicked the Run button. Eclipse finished building the build and then I right clicked on the gmbuilder project folder and hit refresh. This created a new dist and thus I created a personally built copy of GenMAPP Builder. | |
| − | + | ||
{{Template: Jwoodlee}} | {{Template: Jwoodlee}} | ||
Latest revision as of 05:38, 24 November 2015
Contents
Individual Journal Assignment
The "Milestones" can be found here on the Coder guild page.
Milestone 1: Version Control Setup
Since I already had a GitHub account, Dondi added me to the XMLPipeDB project on GitHub. I then selected the branch dropdown menu on the project entitled "Branch:master" and typed into the create new branch field "s-flexneri". This will allow me to make my own commits without changing the master branch.
Milestone 2: “Developer Rig” Setup and Initial As-Is Build
I downloaded Eclipse IDE for Java EE Developers and ran the .exe. From there, I followed the instruction on:GenMAPP Builder Project Setup and Initial Build.
I installed Eclipse to the T drive on my lab computer because I decided that would be my development environment. I also determined I wanted my Git clone to be on my T drive as well. So I used cd to get into the T drive and typed the command: git clone https://github.com/lmu-bioinformatics/xmlpipedb.git. I used cd To get into the clone folder: xmlpipedb. I switched to the "s-flexneri" branch: git checkout s-flexneri so my commits will be in the proper branch.
When I first started up eclipse I selected the repository clone folder as my work space. I then clicked the workbench button. This setup my eclipse work space.
Java Project Setup
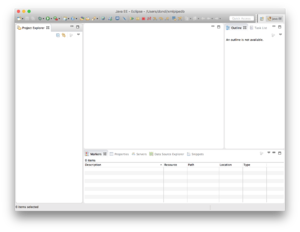
- I right clicked in the Project Explorer tab and chose New > Project...
- I then chose Java Project from the list of wizards and clicked Next.
- On the next panel, I entered
gmbuilderas the Project name:. - I clicked on the Finish button with no further configuration.
- I clicked Yes when Eclipse asked if I wanted to open the Java perspective.
Initial Build of GenMAPP Builder in Eclipse
I opened the gmbuilder project by clicking on the little gray triangle left of its name. I right clicked on build.xml and chose Run As > Ant Build... (including ellipses). I then unchecked dist and rechecked clean and dist in the Targets tab in that order. When the order of the Target execution order box saidclean, dist I clicked the Run button. Eclipse finished building the build and then I right clicked on the gmbuilder project folder and hit refresh. This created a new dist and thus I created a personally built copy of GenMAPP Builder.
BIOL 367, Fall 2015, User Page, Team Page
| Weekly Assignments | Individual Journal Pages | Shared Journal Pages |
|---|---|---|
|
|
|
|
